> ## Documentation Index
> Fetch the complete documentation index at: https://gcore-doc-1046.mintlify.site/llms.txt
> Use this file to discover all available pages before exploring further.
# Manage DNS hosting
You can use our DNS hosting service to manage DNS records of your domains. You can manage up to 25 domains for free.
## Activate DNS hosting
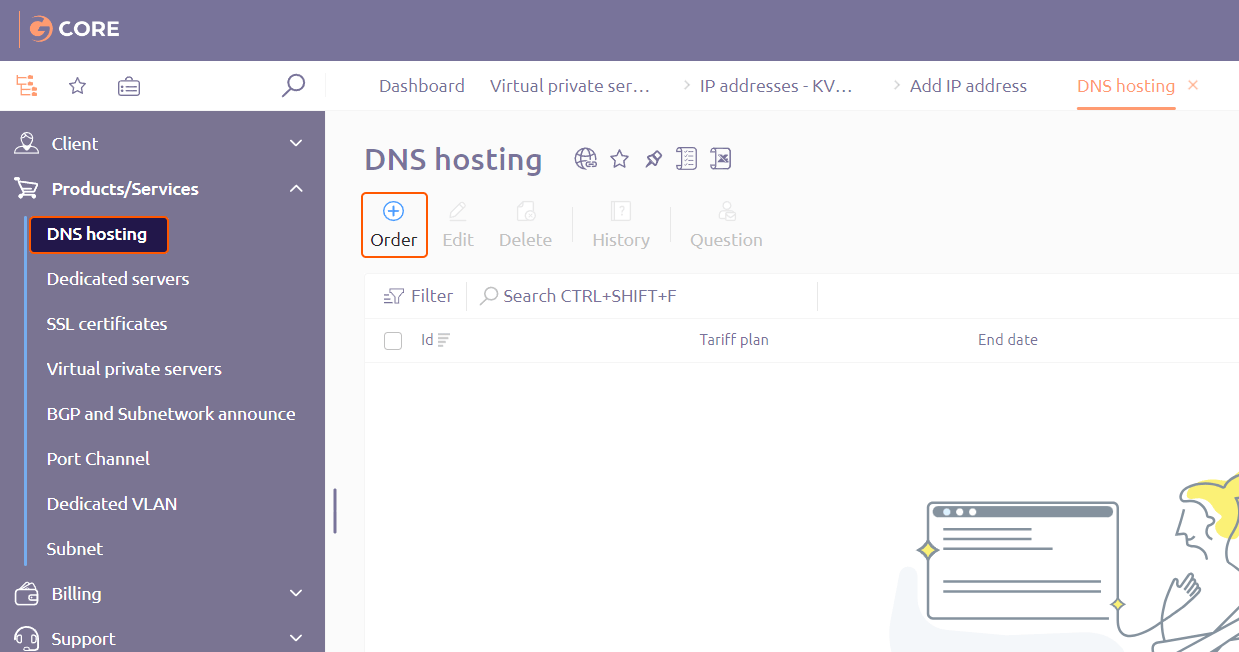
1. In the list of services, click **DNS hosting** and then click **Order**.
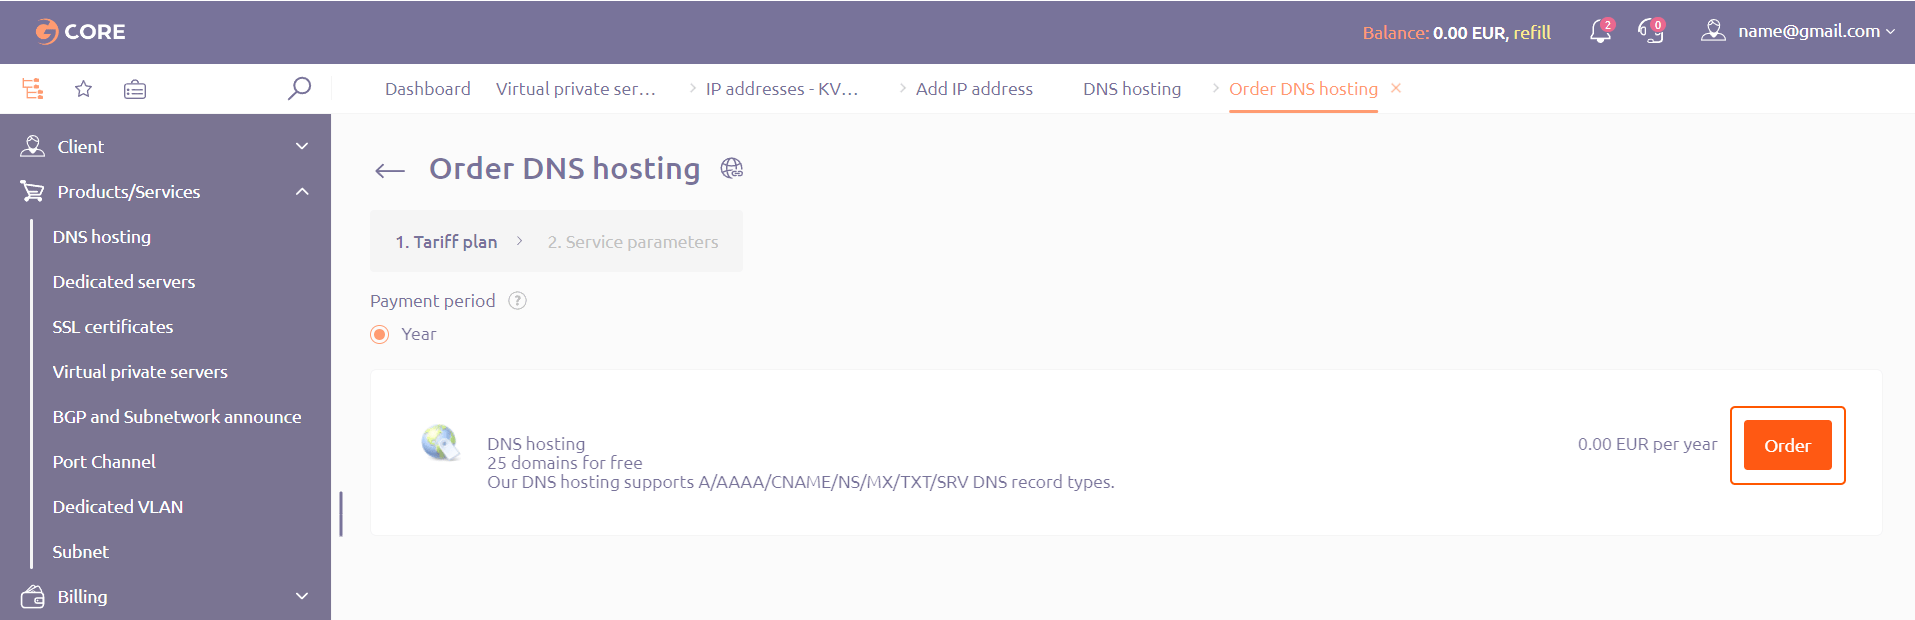
 2. In the window that opens, click **Order**.
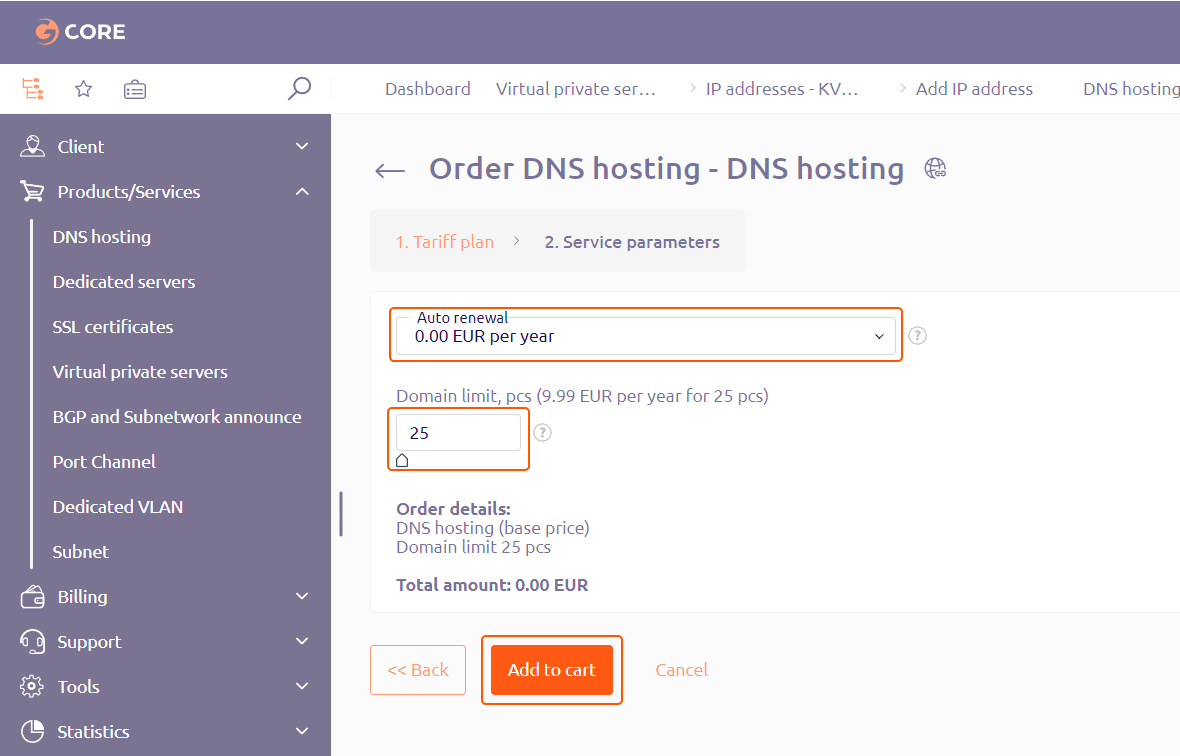
 3. State whether you require annual auto renewal and specify the number of domains you wish to manage with this service. Then, click **Add to cart**.
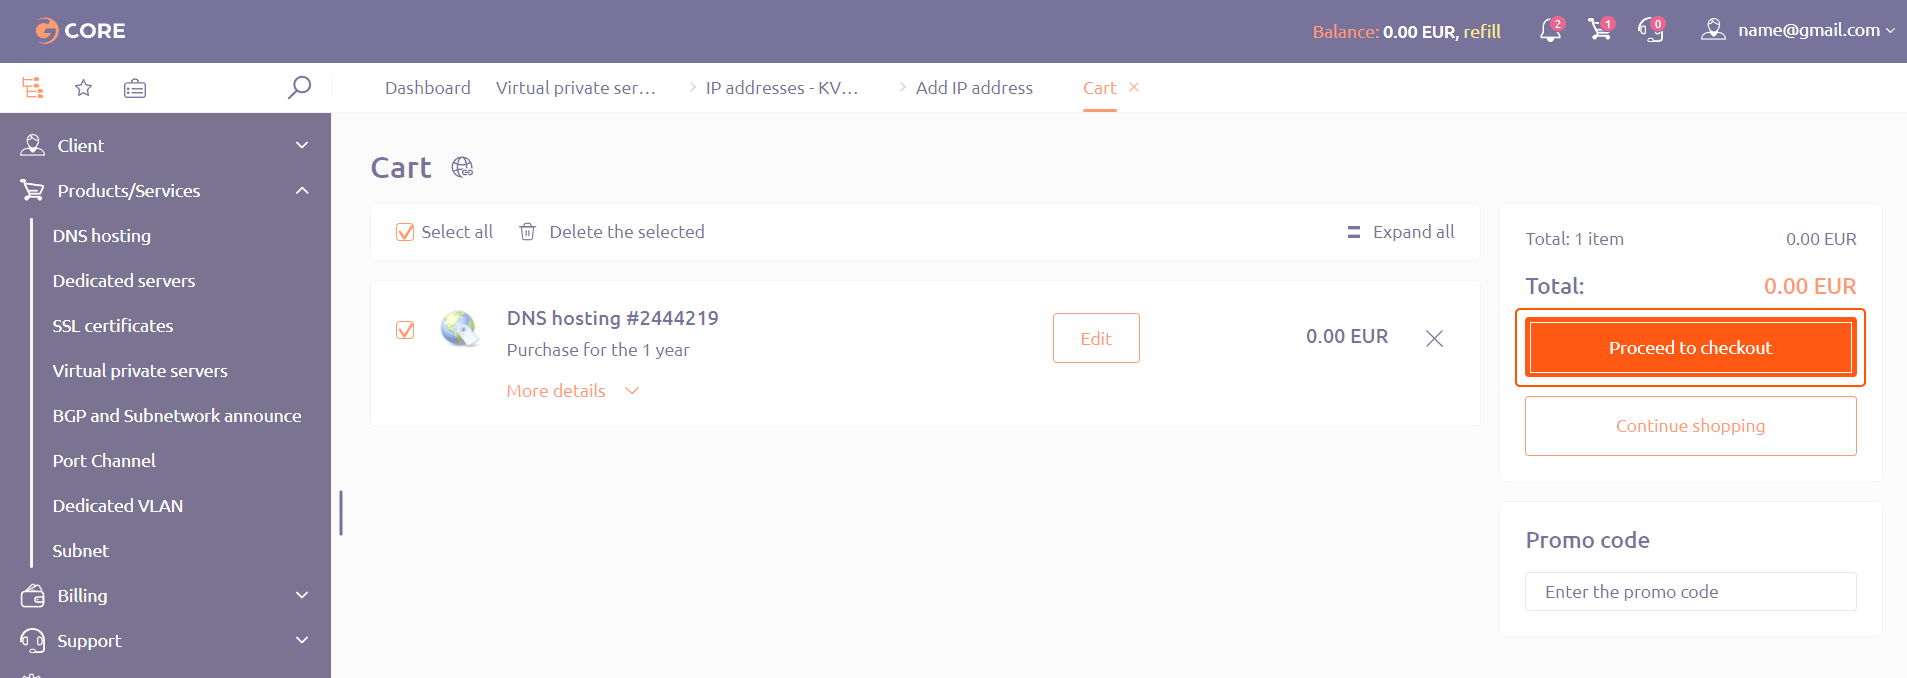
 4. Click **Proceed to checkout**.
 A pop-up on the right side of the screen will confirm that the order has been successfully placed and paid for.
## Set up DNS hosting
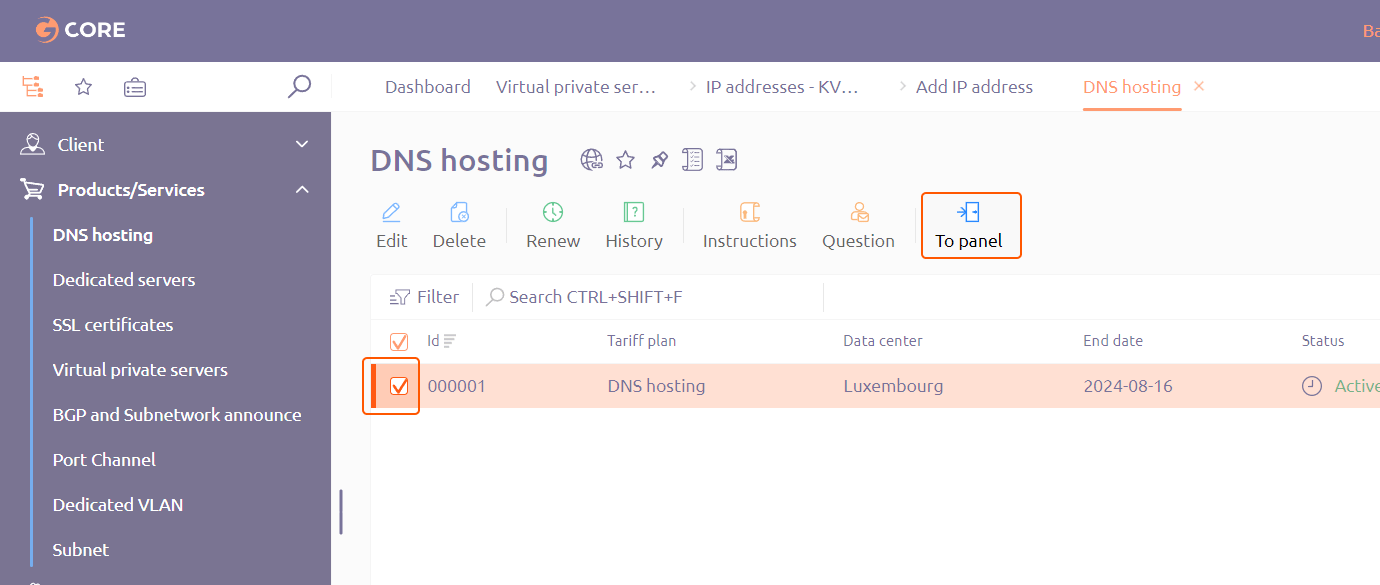
1. Navigate to the **DNS hosting** service section, check the checkbox next to the relevant service, and then click **To panel**. This will open the DNS hosting control panel.
A pop-up on the right side of the screen will confirm that the order has been successfully placed and paid for.
## Set up DNS hosting
1. Navigate to the **DNS hosting** service section, check the checkbox next to the relevant service, and then click **To panel**. This will open the DNS hosting control panel.
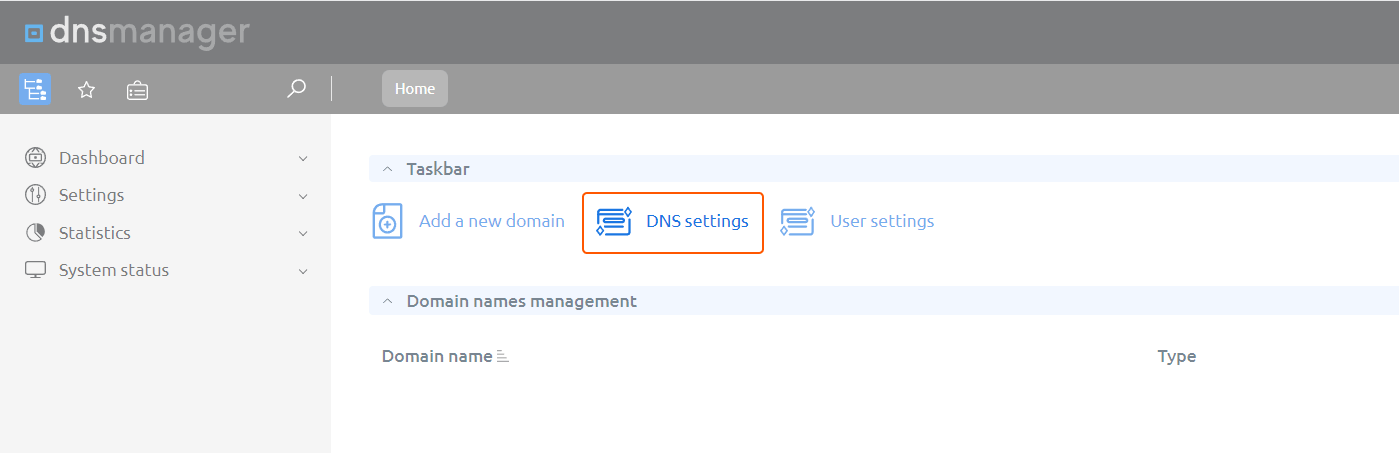
 2. In the window that opens, click **DNS settings**.
 3. Provide the following settings:
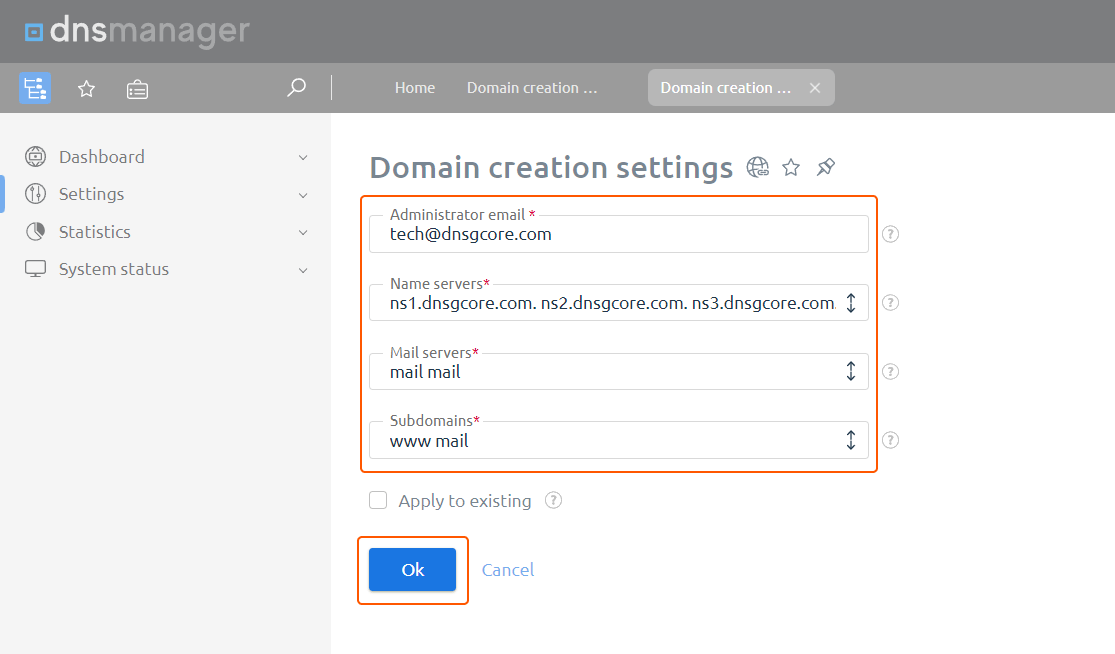 **Administrator email** : Specify an email address of the administrator responsible for the domain's DNS. It will be listed in the start of authority (SOA) records of the managed domains.
**Name servers** : Since you're using our DNS service to manage DNS for domains added in the service, your Gcore NS values are already filled by default. **Don't change the value in this field!**
**Mail servers** : Specify the mail server(s) that will manage email for this domain. Those servers will be listed in the MX records of your domain.
**Subdomains** : Enter the subdomains that will be automatically created and linked to your main domain. Those subdomains will be indicated in the A records of your domain.
4. Click **OK** to apply the settings.
## Manage domains
1. Navigate to **DNS hosting**, check the checkbox next to the relevant service, and then click **To panel**.
2. In the window that opens, click **Add a new domain**.
**Administrator email** : Specify an email address of the administrator responsible for the domain's DNS. It will be listed in the start of authority (SOA) records of the managed domains.
**Name servers** : Since you're using our DNS service to manage DNS for domains added in the service, your Gcore NS values are already filled by default. **Don't change the value in this field!**
**Mail servers** : Specify the mail server(s) that will manage email for this domain. Those servers will be listed in the MX records of your domain.
**Subdomains** : Enter the subdomains that will be automatically created and linked to your main domain. Those subdomains will be indicated in the A records of your domain.
4. Click **OK** to apply the settings.
## Manage domains
1. Navigate to **DNS hosting**, check the checkbox next to the relevant service, and then click **To panel**.
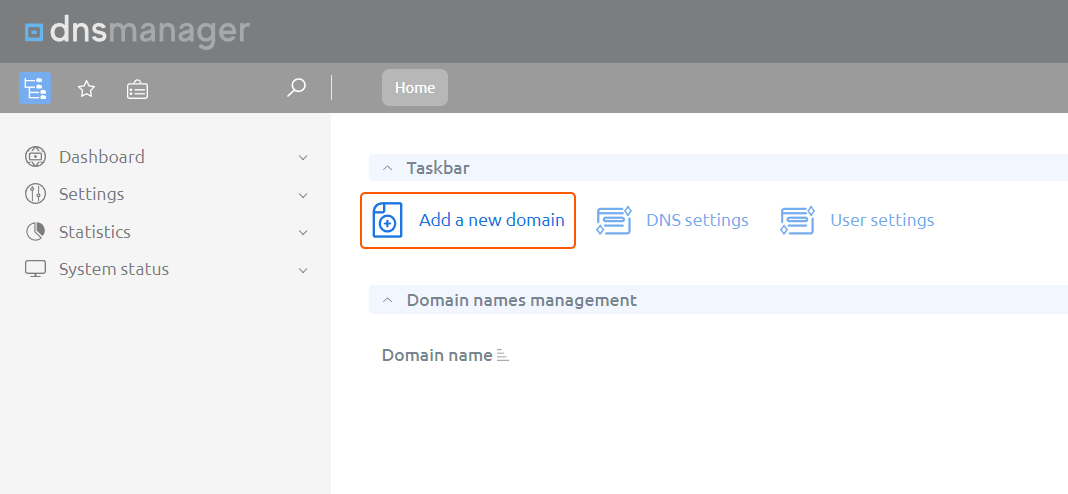
2. In the window that opens, click **Add a new domain**.
 3. Specify the domain you wish to manage along with the associated settings.
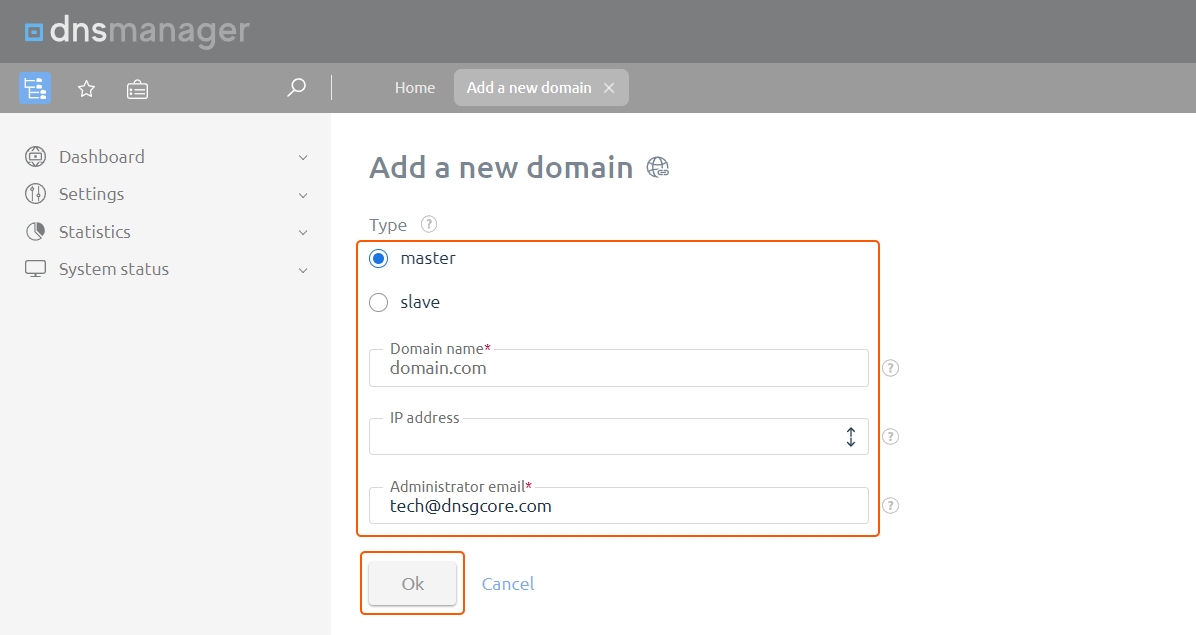 **Type** : Indicate whether the new domain is a master or a slave domain. A master domain contains and manages records of the domain zone. Multiple slaves can be connected to the master. A slave domain receives and retains information about domain zones from the master.
**Domain name** : Enter the domain for which you wish to manage DNS records.
**IP address** : Enter the IP address of the server hosting your domain.
**Administrator email (for the master type domains only)** : Specify an email address of the administrator responsible for the domain's DNS. It will be listed in the Start of Authority (SOA) records of the managed domains.
4. Click **OK**.
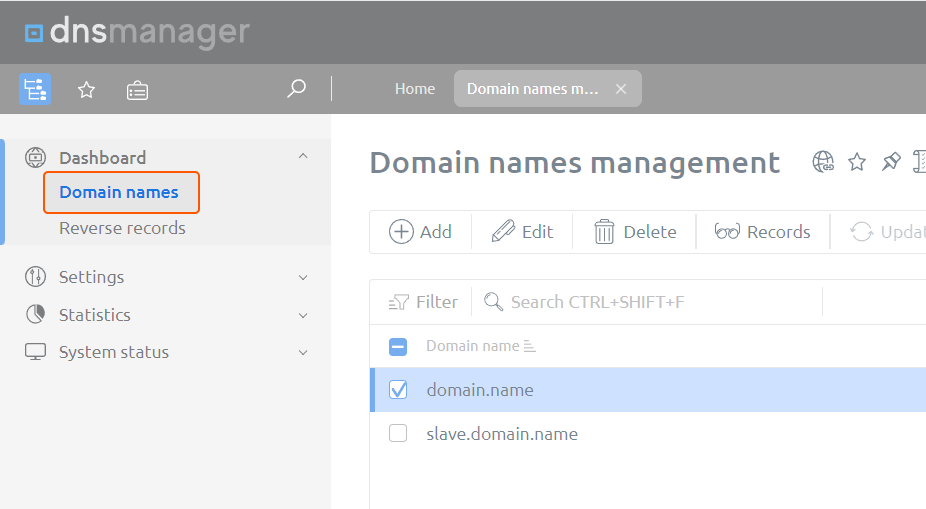
You can view the created record in the **Domain names** tab.
**Type** : Indicate whether the new domain is a master or a slave domain. A master domain contains and manages records of the domain zone. Multiple slaves can be connected to the master. A slave domain receives and retains information about domain zones from the master.
**Domain name** : Enter the domain for which you wish to manage DNS records.
**IP address** : Enter the IP address of the server hosting your domain.
**Administrator email (for the master type domains only)** : Specify an email address of the administrator responsible for the domain's DNS. It will be listed in the Start of Authority (SOA) records of the managed domains.
4. Click **OK**.
You can view the created record in the **Domain names** tab.
 ## Manage DNS records
1. In the **DNS Hosting** control panel, navigate to the **Domain names** tab. Check the checkbox next to the domain for which you wish to set records. Then, click **Records**.
2. A list of DNS records of the selected domain will appear. Click **Add** to add a new record.
## Manage DNS records
1. In the **DNS Hosting** control panel, navigate to the **Domain names** tab. Check the checkbox next to the domain for which you wish to set records. Then, click **Records**.
2. A list of DNS records of the selected domain will appear. Click **Add** to add a new record.
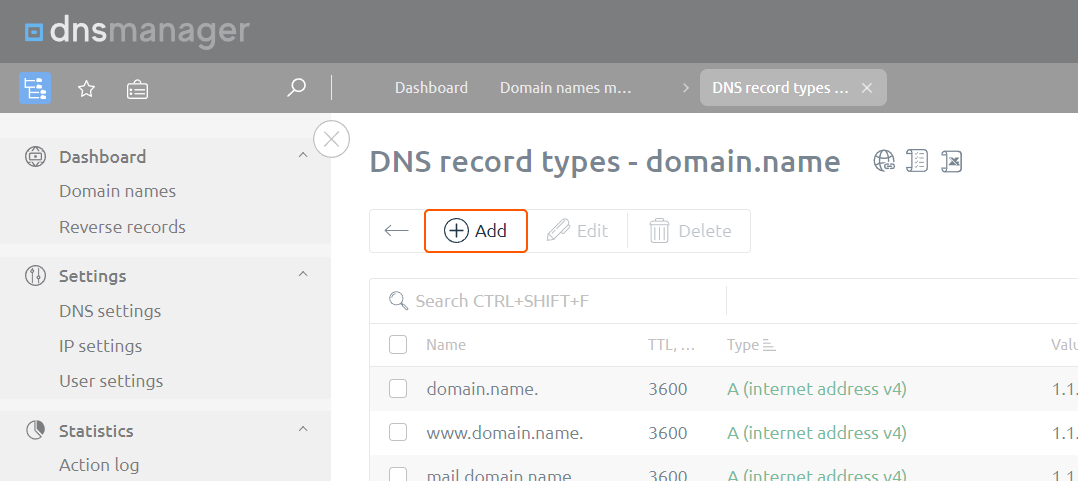 3. Modify the record you wish to add:
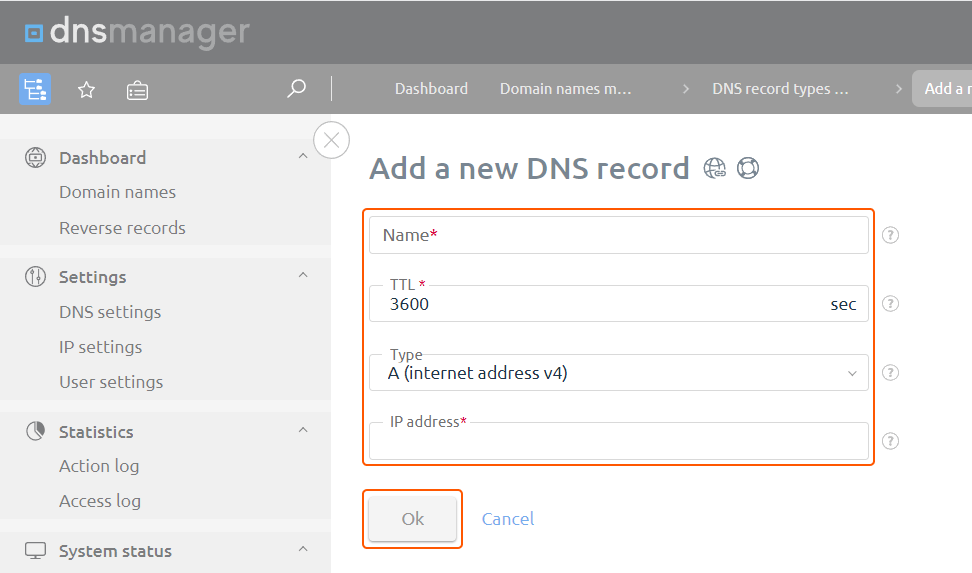 **Name** : Enter a subdomain, excluding the main domain.
**TTL** : Indicate the duration for which a DNS record should be cached.
**Type** : Specify the type of record.
**Additional fields** : Fill in the fields that appear based on the record type. For instance, for an A record, an IP address is required, whereas for a PTR record, you need to specify a domain name.
4. Click **OK**.
**Name** : Enter a subdomain, excluding the main domain.
**TTL** : Indicate the duration for which a DNS record should be cached.
**Type** : Specify the type of record.
**Additional fields** : Fill in the fields that appear based on the record type. For instance, for an A record, an IP address is required, whereas for a PTR record, you need to specify a domain name.
4. Click **OK**.